
We have launched a brand new series called ‘How to take a photo like this’. Each post will present a photo recipe and explain in detail how to take this kind of photo.
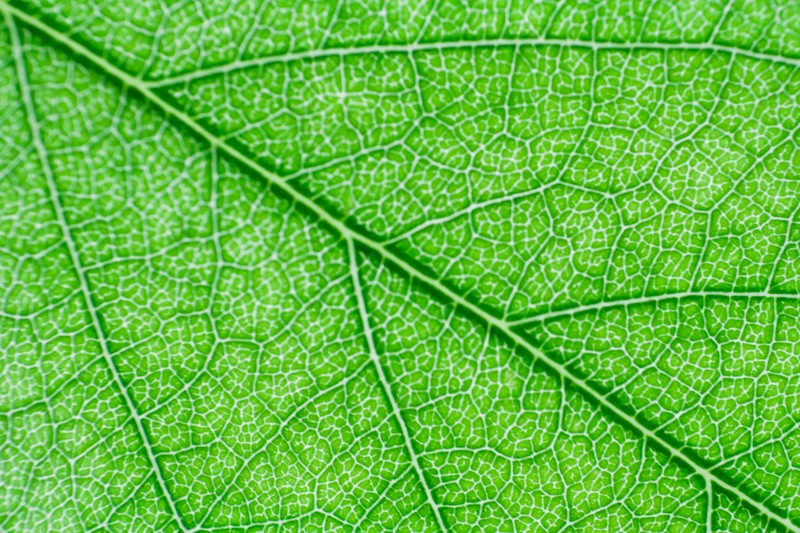
Today’s post focuses on taking a very close-up image of a leaf to capture its veins in detail. Obviously there are many ways of creating this style of image. In this technique the idea here is to have the leaf backlit by a light so that it exposes all the details of the leaf. Next to capture such a close up we have to get really close to the leaf, however unless you are using a Macro Lens you will find that you camera will just cycle through its focus range and never focus on the subject which is the leaf.
To get around the focusing issue we used a method of Reverse Mounting your Lens. This technique allows you to take your ordinary lens and turn it into a macro lens.
Equipment
- Digital SLR Camera – We are using a Canon 400D
- Lens – Canon 18-55mm kit lens
- Reverse Mount ring 58mm
- IKEA table lamp with cool white 75watt equivalent energy saving globe
- Tripod and remote trigger are recommended, however not used in this photo
Our Subject
Before we start shooting we need to find a suitable subject which is a leaf that is somewhat translucent. You will need to scout your garden or park nearby to find a suitable leaf. you may also consider taking a fresh leaf of a plant as it will be more translucent than others. As a leaf matures it takes on a darker colour and becomes less translucent.
Setup
Now that you have your subject let’s setup our environment. You will need to shoot indoors in a calm and still room, we don’t want any wind movement as we are going to be shooting extreme close-up.
- Turn on your IKEA lamp and using sticky tape or masking tape stick the leaf on the edge of the lamp shade like shown below.

- Now let’s grab our camera with the lens mounted. Put the camera in Manual mode and dial an Aperture of f11. Half press the shutter release and then press the Depth-of-field button, while it is depressed remove the lens from the Camera. This is essentially the basic method of reverse mounting.
- Put the camera cap on the camera and rear cap on the lens. Take your Reverse Mount ring and screw it to the front of the lens where you would typically attach a filter. Now mount the lens on the camera using this Reverse Mount ring.

- Switch the lens to Manual focus mode, auto focus is not possible any more. Remove the rear lens cap from the lens and start to focus on the subject. Fill your frame as much as possible and have you camera pointing dead flat at the leaf so that you get all of the leaf in focus. Manually focusing the leaf will take some practice and trials, you will need to adjust both the zoom and focus ring of your camera lens. You may wish to use a tripod if you find it difficult to hand hold the camera steadily. Also when you press the shutter release check the shutter speed, anything lower than 1/60th means camera shake unless on a tripod. If your shutter speed is low, increase the ISO and keep increasing it until you get a fast enough shutter.
- Before you start shooting switch the camera into continuous shooting mode. This is only beneficial if you are hand holding. focus on the leaf and fire away.

Once you have taken enough shots you can download your photos in your favourite application and give it some final touches, like cropping, exposure adjustment and black points.


